Installing
Fetch an item onto disk — the curl one-liner, the bkstr CLI, and where each agent reads files.
Once you own an item — or for any free item — you install it by fetching its files onto disk. bkstr gives you two ways to do that: a one-line curl command and the bkstr CLI. Both download the same bundle.
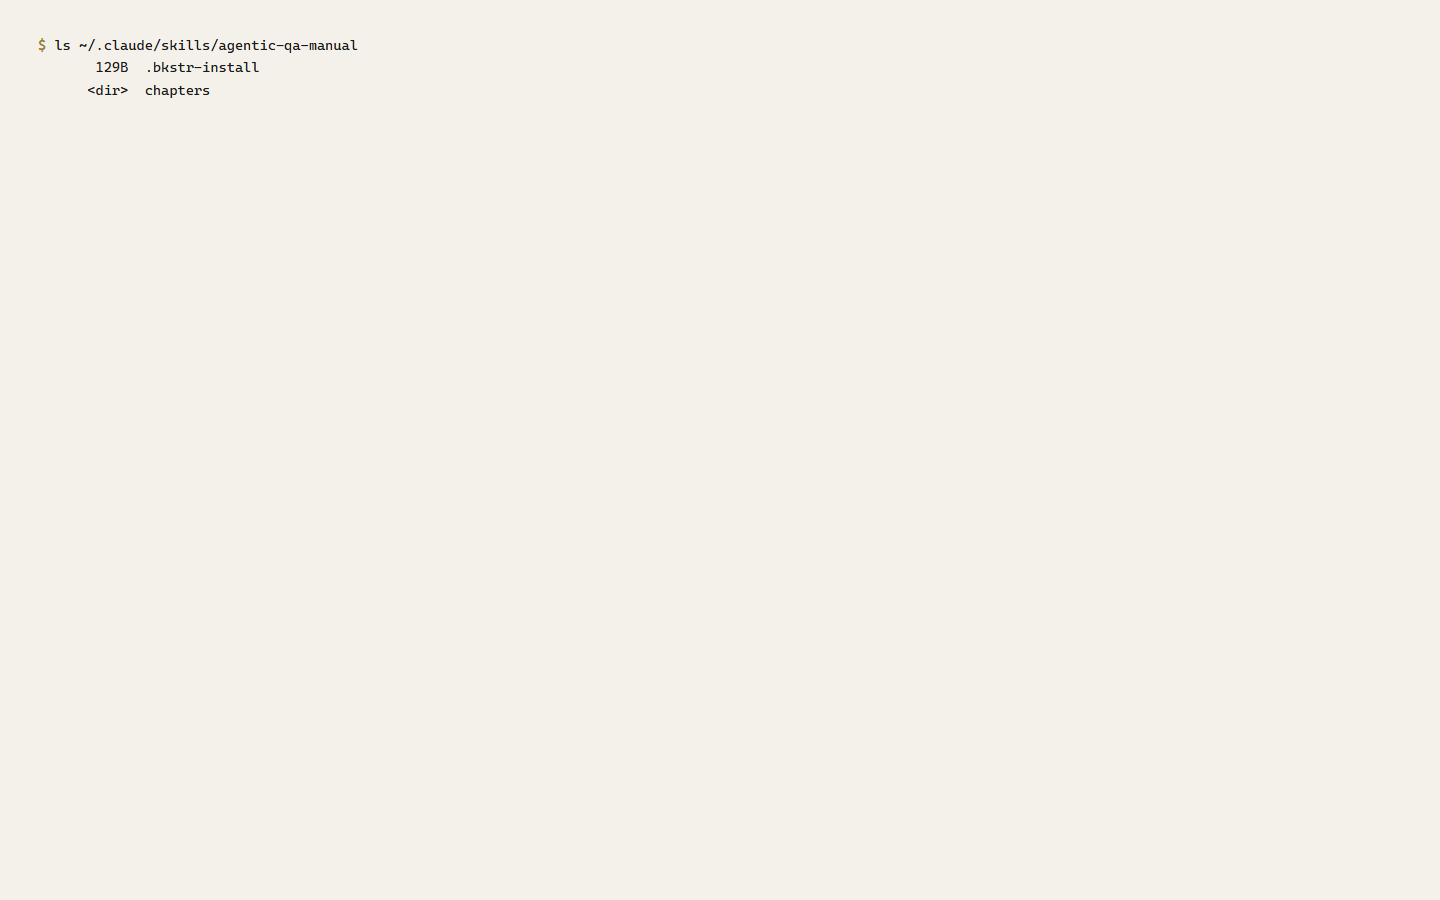
The bundle is a gzipped tar archive. Every file inside is namespaced under the item's slug, so extracting it drops a single <slug>/ directory wherever you point it. The first file in every bundle is .bkstr-install, a one-line record of when and what was fetched.
Install with curl
The install endpoint is GET /api/install/<slug>. Pipe it straight into tar:
# Free item — runs as-is, no account, no key
mkdir -p ~/.claude/skills && curl -sL https://bkstr.tmrwgroup.ai/api/install/<slug> | tar xz -C ~/.claude/skills/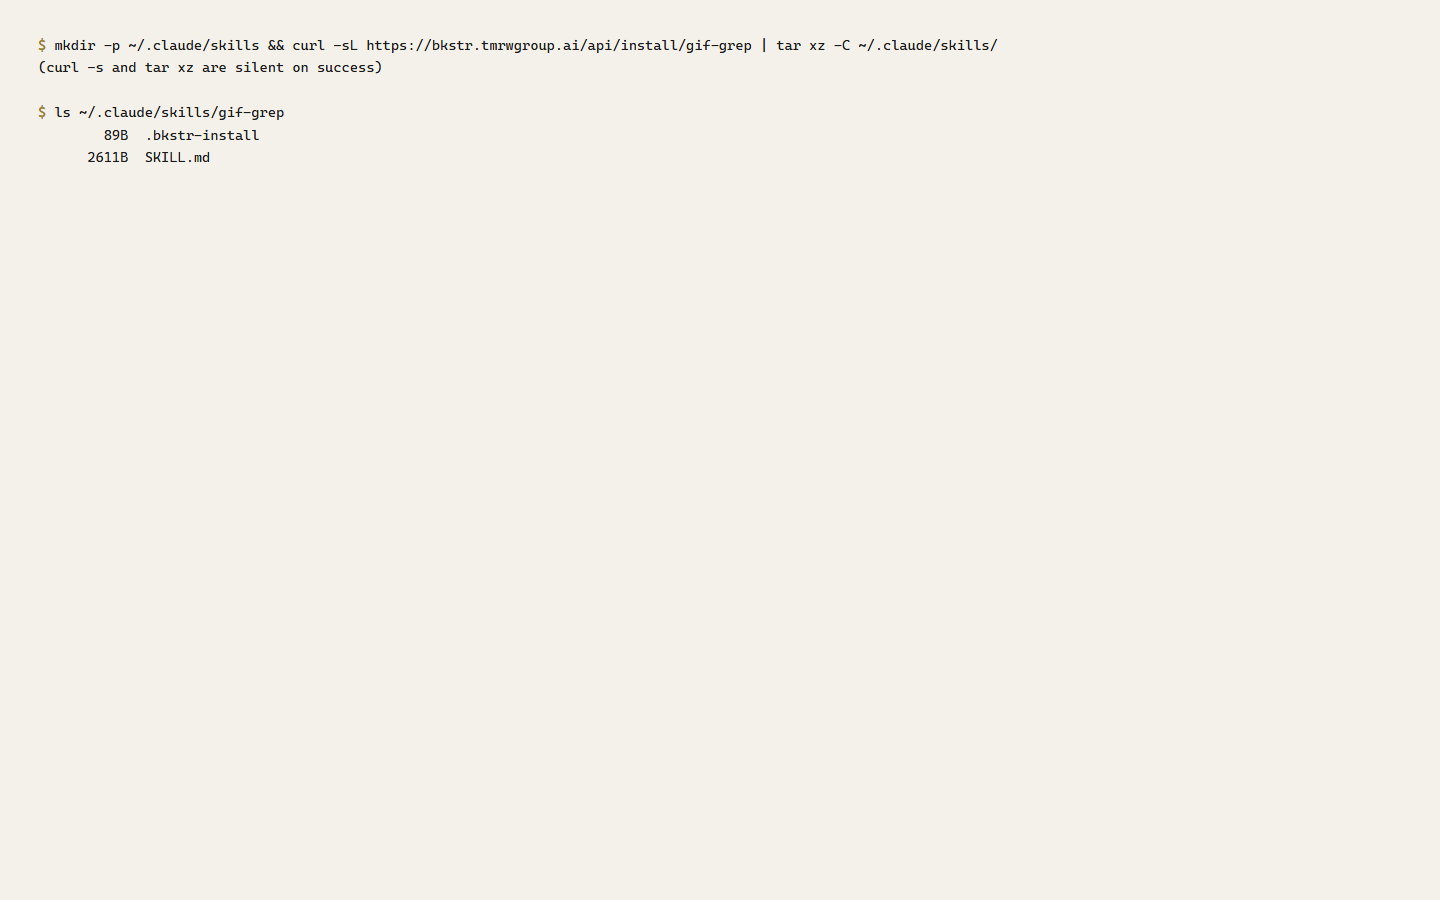
A free item installs anonymously — no key, no Authorization header. A paid item needs a Bearer token, and your account must hold a grant for it. Paste both lines together so the export feeds the curl:
# Paid item — paste both lines; the export feeds the curl
export BKSTR_KEY=bks_your_key_here
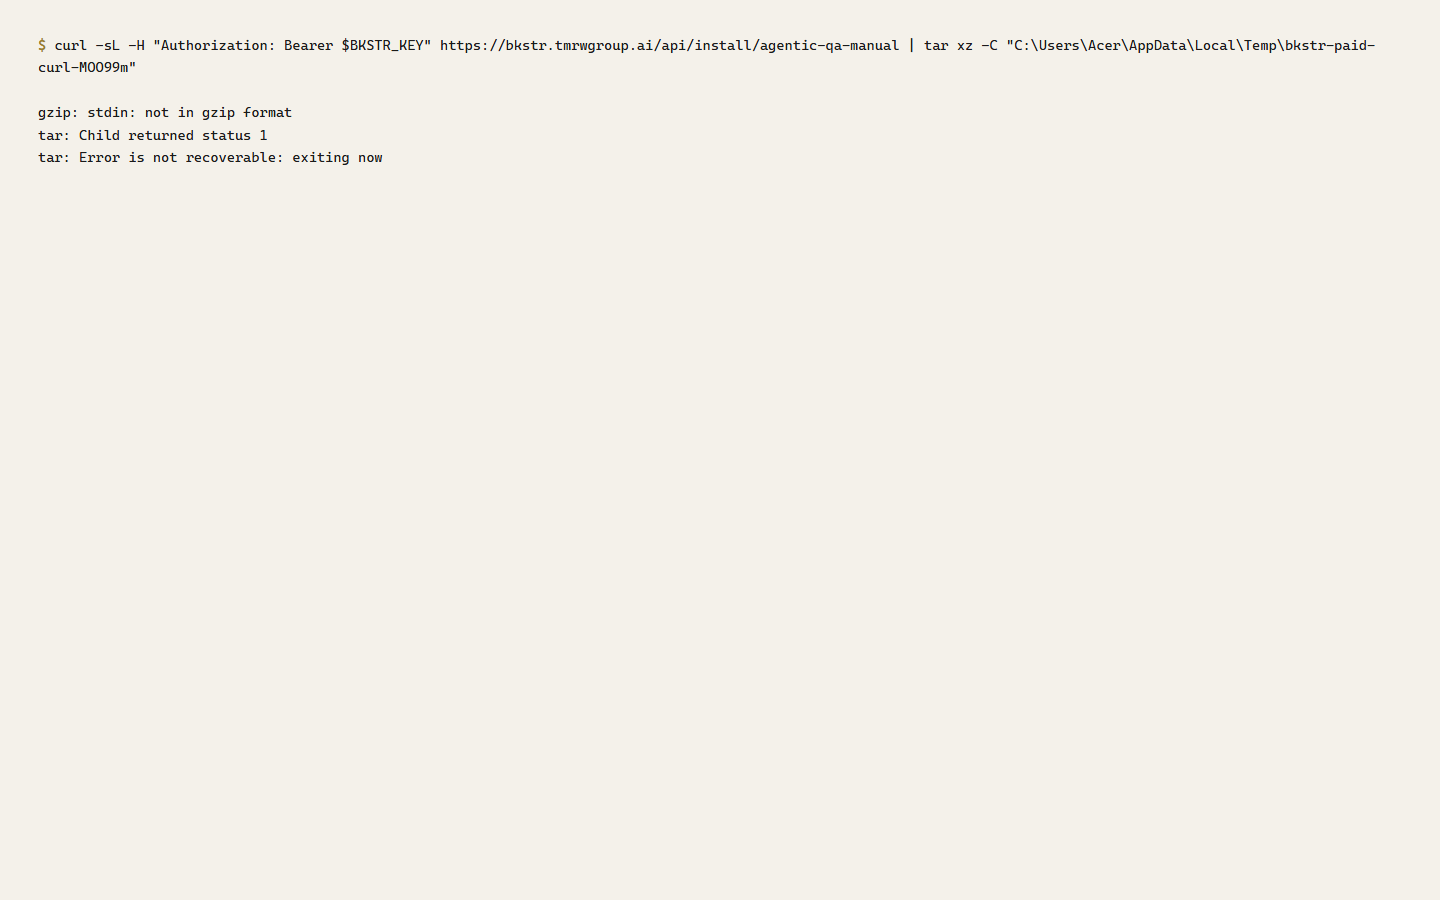
mkdir -p ~/.claude/skills && curl -sL -H "Authorization: Bearer $BKSTR_KEY" https://bkstr.tmrwgroup.ai/api/install/<slug> | tar xz -C ~/.claude/skills/Create a key at /dashboard/api-keys. The leading mkdir -p is there so the command works on a fresh machine where the target directory does not exist yet.
A raw curl | tar trusts the server. bkstr emits clean, slug-namespaced archives, so a direct pipe is safe against the bkstr catalog. The CLI below adds its own extraction guard — it inspects every archive entry before writing anything to disk — which is the safer path if you ever pipe an archive whose origin you do not control.
Install with the bkstr CLI
The CLI is the npm package @clawbot678/bkstr. It wraps the same install endpoint and adds the safe-extraction pass.
# Zero install — run straight from npm (free items)
npx -y @clawbot678/bkstr install <slug>

# Or install it globally
npm install -g @clawbot678/bkstr
bkstr install <slug>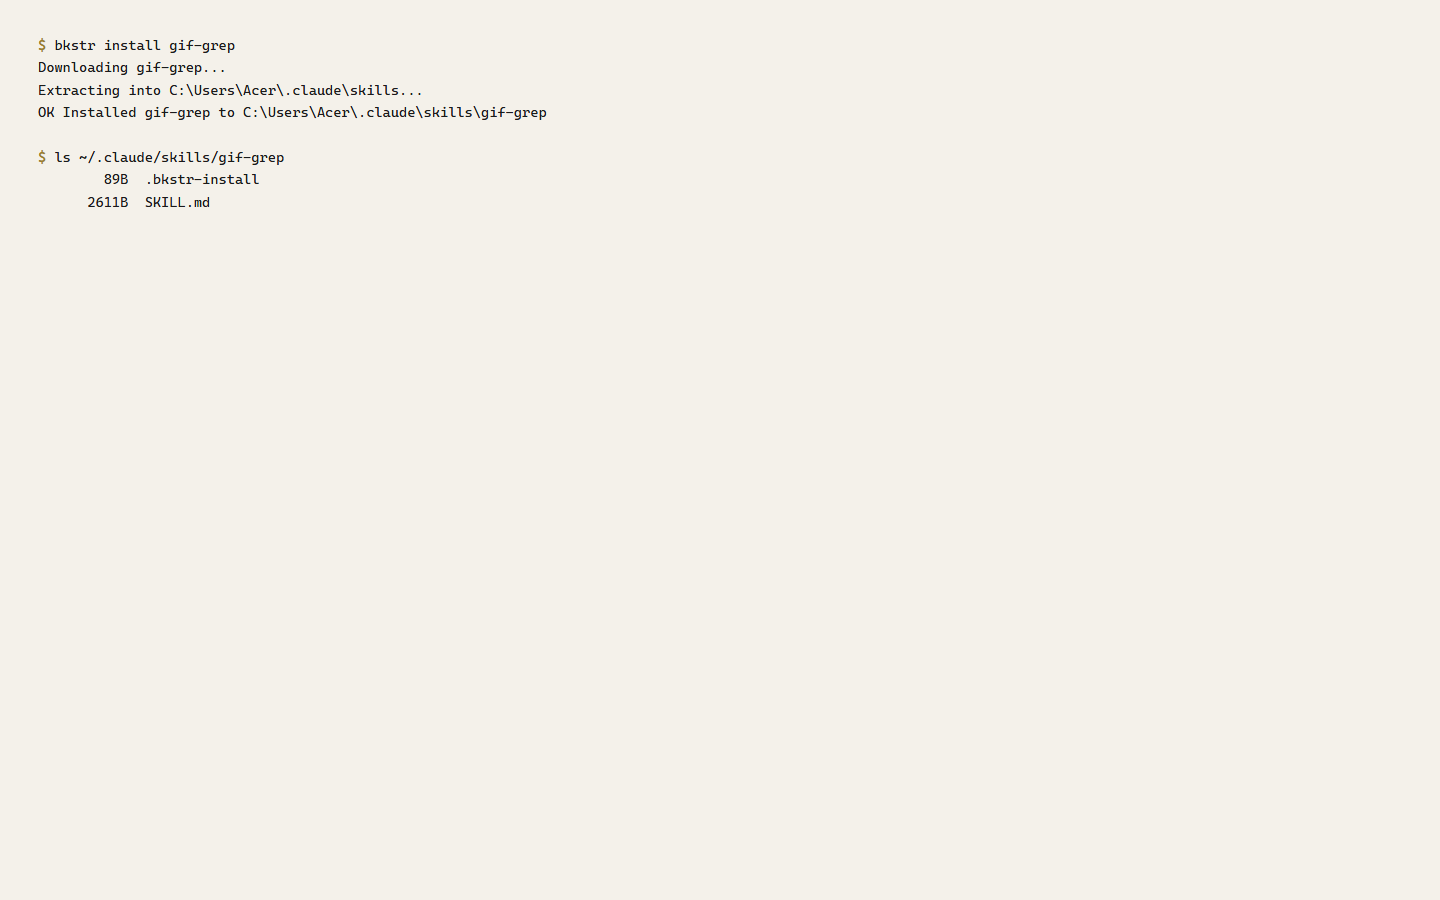
For paid items, authenticate once with bkstr login. It prompts for your key and stores it in a local config file, so nothing is left in your shell history:
npm install -g @clawbot678/bkstr
bkstr login
bkstr install <slug>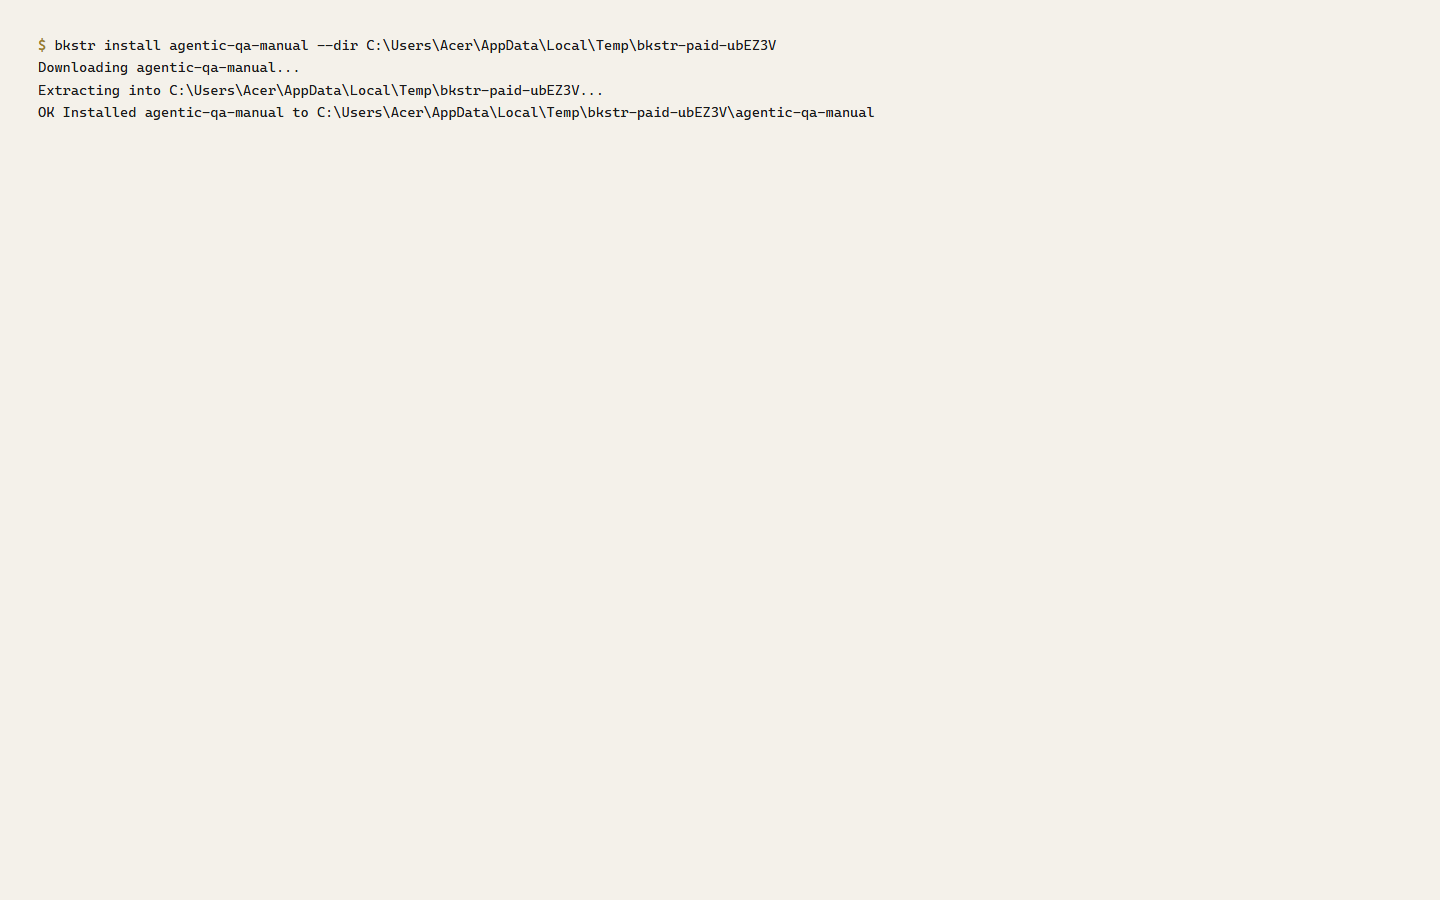
The CLI resolves your key in a fixed order: the BKSTR_KEY environment variable first, then the stored config file. bkstr install writes the bundle to ~/.claude/skills/ by default; --dir <path> points it anywhere else. curl works for paid items too, with the Bearer header:
Either way, the result on disk is the same — a <slug>/ directory holding the item's files and the .bkstr-install record:
The CLI's full command list, flags, exit codes, and config-file locations are in the CLI reference.
Where to install — by agent
The install command is the same for every agent; only the target directory changes. tar xz -C <dir> — or the CLI's --dir <dir> — puts the bundle where your agent reads files.

- Claude Code —
~/.claude/skills/. The default; no flag needed. - Cursor —
.cursor/rules/inside your project. Cursor reads them as project rules. - Cline — no fixed directory; unpack under
./bkstr/and reference files from the chat panel. - Aider — unpack anywhere, then add files with
--reador the/readcommand.

The directories for Cursor, Cline, and Aider follow each agent's documented configuration model. The public Get started page carries the exact per-agent commands.
Free vs paid — what you need
| Free item | Paid item | |
|---|---|---|
| Account | Not required | Required |
| API key | Not used | Bearer token required |
| Access grant | None — free items are never owned | Required for your account |
| Without auth | Installs anyway | 401 (no or invalid key) or 403 (key valid, no grant) |
A free item is installable by anyone and is never recorded as owned. A paid item needs both a valid key and a grant; missing either one fails before any files are sent.